
Ingredients:
-
8 kg of Red Round Bell Peppers
-
2 big heads of Cauliflower
-
4 big Carrots
-
Celery Root – 4 small heads (Not Apio!!!)
-
Celery Leaves – the branches / sprigs from 1 head of celery
-
Horseradish – 2 roots = 4 stalks
-
Peppercorns – 10 peppercorns
-
Mustard Seeds – 1 tablespoon / 20 gr
-
Bay Leaves – 3-4 leaves
For Preparing the Brine used for Cauliflower Recipe :
-
Water – 6 liters
-
Vinegar – 3 liters (to 1 liter of vinegar you add 2 of water)
-
Salt – 100 gr
-
1 big jar of Honey – 800 ml (it can be a little bit bigger but make sure it’s not smaller)
-
Peppercorns – 20 peppercorns
-
Bay Leaves – 3-4 leaves
-
Celery – 5-6 sprigs
-
Horseradish – 1 root cut into big chunks (3,4,5 chunks…)
You will also need a jar of minimum 10 -12 liters or maximum 15 liters. They can also be stored in smaller jars of 800 ml for example, if they are cut into chunks or strips.
Instructions to prepare the cauliflower recipe:
-
-
-
The bell peppers get washed and drained from the water. Then you cut their tails (if they have them) and you use a toothpick to punch a few holes around the stub. The carrots get washed, peeled and cut into rounds or stalks. The celery gets washed, peeled and cut into chunks. The cauliflower gets sliced / ripped into chunks / florets and washed properly. The leaves and the stub from the cauliflower get thrown away. The celery leaves / sprigs get a thorough wash and they will be used inside the jar and inside the brine. The horseradish gets washed, peeled and cut lengthwise into 4 stalks (or in 2-3 if it is to thin). 2 roots of horseradish = 4 stalks / you cut it in half if the size allows it.
-
-
How to prepare the brine for the pepper and cauliflower recipe:
-
-
-
Into a 20 litre pot we place all the ingredients for the brine and we bring them to a boil. When the brine is boiling for 5 minutes now, we can place a layer of whole (or sliced) bell peppers – as many as the liquid can take in order to make it easy for you to flip them. You should be able to finish them in 3-4 batches. Cover them with a lid (you can do it without covering them as well… this just speeds up the process) and let them boil for around 2-3 minutes, flipping them every now and then on each side. If your bell peppers are cut into slices, when you take them out of the boiling brine you drain them immediately in a colander, making sure you get rid of the brine juice. The bell peppers that are taken out of the boiling brine get placed into a big bowl or pot and get covered with a lid.
-
-
-
-
-
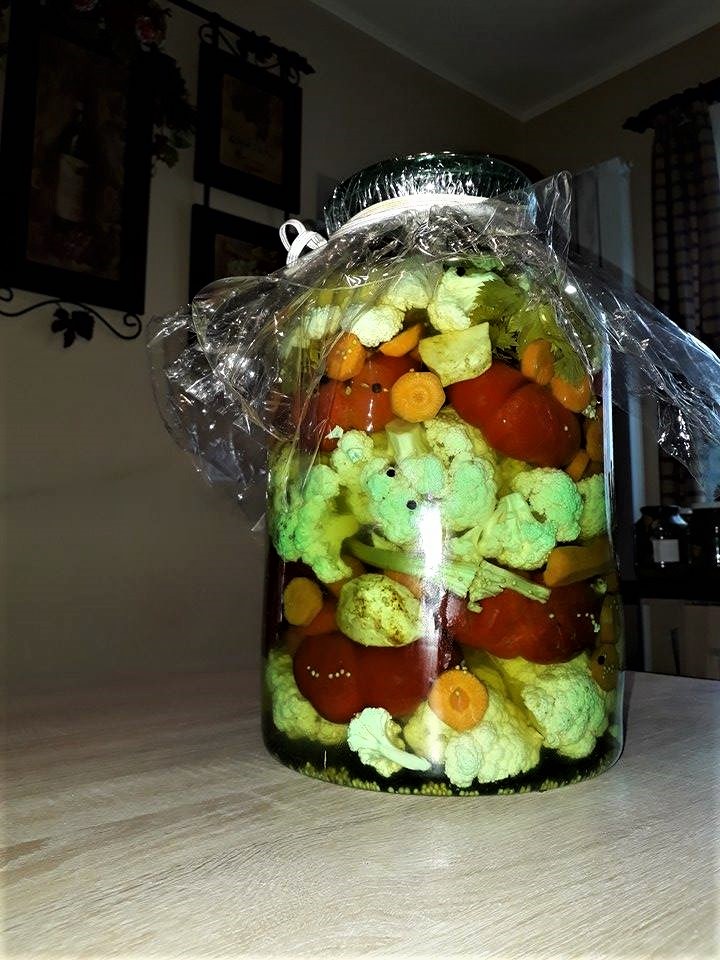
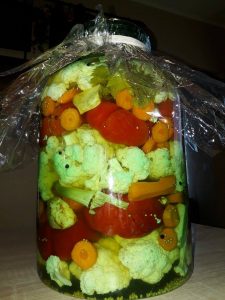
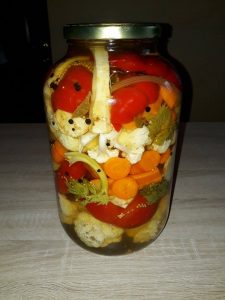
After you’ve parboiled all of the bell peppers you can start arranging them nicely alongside the rest of your vegetables, alternating while you insert them into your prearranged jar. The jar must be placed on top of a metal tin or on top of 2 long knives arranged into an x / cross on the table. This will prevent the glass of the jar from cracking in contact with the hot / boiling liquid of the brine. After poring in the liquid and after the jar becomes warm / hot, you can remove the knives or the tray at any time…
-
-
-
-
-
We use all the ingredients but 1 or 2 sprigs of celery and 2-3 stalks of horseradish which we will arrange in the shape of a cross / x / star, above all of the vegetables, right underneath of the jar mouth, right under the lid, to prevent the vegetables from rising above the brine. If they rise above the liquid, the ones that do, get ruined. They get very soft and have to be thrown away. The ones from underneath are still good though, but you can’t use the ones on top as a lid so that the ones under them stay well submerged into your liquid… If you do this you risk that all of your pickles get ruined and you might end up throwing them all. If it happens to you and one or more than one vegetables from the surface get ruined, just throw them away and that’s that.
-
-
-
-
-
The peppercorns, the mustard seeds and the bay leaves (the spices) get placed above the horseradish.
-
-
-
-
-
Then, with the help of a ladle, you pour the brine liquid into your jar until the vegetables are covered by it with about 1 cm. If you have some brine left over, you have to save it because it is possible you might need it later.
-
-
-
-
-
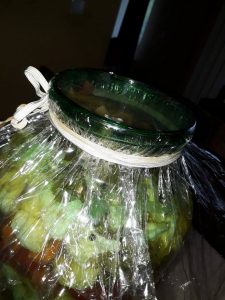
Now it’s time to put the lid on or if you don’t have a lid, you can use a double layer of cellophane and tie it with some elastic (or even an old pair of silk stockings – you need something elastic that won’t allow the air to get inside). We don’t advise you to use rope because there is the risk that the air might come in. But in the end, if you have enough strength in your hands and you are sure that you would be able to tie it really well without making a knot (because you will want to untie and tie the lid again various times once you start eating your pickles…), you can try the rope idea as well… It’s all up to you!
-
-
-
-
-
Once you’ve sealed your jar, you must move it immediately into a cool room such as a pantry or even better in your cellar. Although we do advise you (from purely hygienic reasons…) to wait 24 hours (it’s not a must), to see if it is necessary to add any more of the brine liquid into the jar. If the vegetables rise above the brine, you will need to do it and that is why it would be a good idea to save your leftover brine liquid… It is possible to be on the safe side and for this to be unnecessary but it is just as possible to be necessary and for you to need it. You could also move your jar of pickles right away and the next day go to your pantry or cellar with the leftover brine liquid and add some more of the brine on top of the vegetables right there, but it will most likely be a lot more difficult and a lot less hygienic. Especially if you choose to use a double layer of cellophane instead of a regular lid… This day / night extra, at a regular temperature, in your kitchen, won’t make such an obvious difference in the taste, texture or warranty of your pickles. It’s all up to you the way you want to proceed with it!
-
-
-
-
-
After approximately one month your pickles are ready and can last for up to 6 months if they were properly sealed and stored! Once you open your jar we advise you to eat it during the next 1 or 2 months or so…So you will have a cauliflower recipe ready for your dinners during the winter period.
-
-
Prep. time for the cauliflower recipe : 2h
Total time until you can taste your caulifolower recipe : 1 month
Notes:
-
This cauliflower recipe can be used to pickle just Red Round Bell Peppers and the ingredients are almost not different at all. Basically you add more bell peppers and no cauliflower…
-
The ingredients or better said the quantity of ingredients can change when it comes to the quantity of vegetables that you wish to pickle and the jars you are using. You can adjust this recipe to fit the quantity of pickles that you wish to prepare. You can pickle more or less vegetables…
-
If you take out of the jar some peppers or cauliflower and you don’t consume them all on that occasion and you wish to save them for the next or third day, you can do so. Do not put them back in the jar. They will last in your fridge happily for up to 5 days – 1 week, in a bowl covered with plastic foil.
-
It’s not imperative to sterilize the jars but if you can do so, this step will ensure a longer lasting period of time for your final product!
Tip for a successful cauliflower recipe: If you wish to have spicy pickles, all you have to do is to add 2-3 red chillies in your jar! It’s up to your own personal taste.
If you liked the recipe give us a like, share and follow us on facebook where you can find us under the name “Magliano’s Comfort Food”.


 Enjoy! 🙂


1 thought on “Peppers and Cauliflower in Vinegar (Mama Flori’s Recipe)”
Pingback: Steak and Fries with Garlic Flavored Butter - Recipeschannel.com